|
|
| Several RC magazines around the world have asked us to write a monthly column. With the kind permission we will re-publish the column at our web site too so all of the XRAY fans can read the latest news and behind the scenes information. Enjoy. |
|
(click to enlarge) |
|
|
|
| I am back after a short break from the last two columns about making the T4 (who were written by Martin). There has been a lot going on right in the last few months: we successfully introduced the new T4 platform, just before Xmas we got the all-new XB4 to market, and we have been working hard to finish up the new 2013 specs of NT1, RX8, and XB9. So plenty of work and a race season that continued after a short Xmas break with the DHI, EOS, ETS, Snowbirds, Winternats, Dirt nitro, Montpellier GP, and plenty of other races. The calendar as usual was fully booked and I am happy after a short Xmas break to be back on the road. |
|
(click to enlarge) |
|
|
|
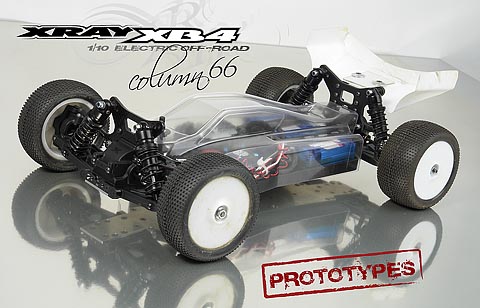
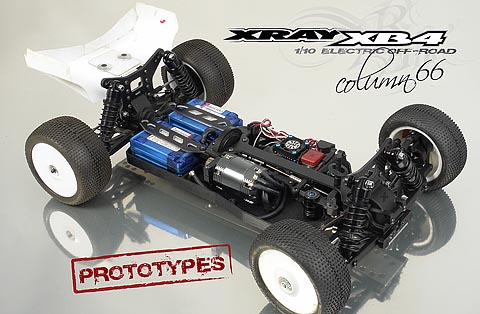
It would not be possible to cover all the happenings in the last months within one column so I have decided to get back to the all-new XB4 to share some first person views.
After successfully introducing the RX8 â“ which was 2 years ago â“ it was time to start working on the all-new platform for the category. Since there are very few categories left where XRAY does not have a car representing, it could be either a 2WD or 4WD 1/10 off-road; or both? Anyway, 4WD off-road got internal priority and was the first 1/10 off-road platform to hit the market. The project name at that moment was XB4, and since we have lived with this internal code name for more than 2 years it stayed on as the official product name. |
|
(click to enlarge) |
|
|
|
| For a designer, an all-new project is always the most exciting since there are no limitations from the previous versions ⦠anything and everything are still possible. At the same time, an all-new project is also the most challenging one since you start from absolute zero and have no basis to build on, so logically an all-new project consumes the most time and resources. To start the project, of course I needed to gain some experience and do a lot of research and analysis. To have first-hand experiences you could have spotted me at various races where I have raced almost all cars available on the market. I have collected a lot of feedback and input from team drivers who have had previous experiences with this class and also I talked to many customers at the races. My goal was not to invent something radically new since as in all other classes the cars have undergone development over the decades and have evolved to a certain design stage. As such the logical plan was to start with the traditional design and to improve on all the possible details to raise the bar a step higher. |
|
(click to enlarge) |
|
|
|
Despite 1/10 off-road being a completely new category for me, still it was a model racing car which has basic same concepts influenced by physics⦠and since our 1/8 off-road program has been very successful I had no worries that we would get something wrong with the new 1/10 category. Moreover, at that time I was working on the all new 1/8 off-road car, the XB9 platform, so many of the construction ideas and concepts were shared between the XB9 and XB4.
The basic goals I set to achieve were logical ones, and typical for any XRAY car:
1.) No compromise, high-competition racing platform
2.) Easy to drive, but fast
3.) Easy to service
4.) Typical XRAY quality and attention to the smallest detail
5.) Reliability
6.) Affordability
To design an easy-to-drive car but one that is fast enough to win races is a dream of every designer. Naturally like any racer, I would like to have the car which has plenty of traction, plenty of steering, good balance in the jumps, easy to control and forgiving of my driving mistakes. That would be a perfect car and these were the points I had planned to achieve, but in reality one trait always comes at the expense of something else so during the entire design process I faced plenty of dilemmas and difficult decisions.
|
|
(click to enlarge) |
|
| Drivetrain: |
|
| The first dilemma was to make it either belt or shaft driven. After some considerations the decision was very easy and clearly favoring a shaft driven concept. Why? In the past with brushed motors I would be considering a belt-driven car. However modern brushless motors are lightweight, higher motive rotating moments that are much more efficient during acceleration so the car is not pushed to one side. For dirt outdoor racing, the shaft drivetrain is more reliable and easier to service. So a shaft-driven drivetrain was an easy choice in this case. |
|
(click to enlarge) |
|
| Chassis flex: |
|
| Those who have experience with other XRAY cars know that chassis flex has some of the most significant influences on handling and performance of the model cars, and that is the reason why in the design stage we give it such a high priority. With every XRAY car we incorporate the XRAY Multi-Flex setting possibilities which allow very easy and comfortable adjustment of chassis flex so the driver can easily adapt the car to different track conditions. Since the XB4 will be run both indoor and outdoor under totally different track conditions, it was even more important to incorporate chassis flex as a primary set-up feature. This was a real nightmare for me in the early stages, as I knew what I needed to achieve but had no idea how to do it. The super-high traction carpet tracks and low-traction dusty outdoor tracks are so completely different that it would be a real challenge to make one chassis to work on both. I could imagine a composite chassis with enough flex to generate traction, or a stiff aluminum chassis suitable for clay tracks such as in the 1/8 category. |
|
(click to enlarge) |
|
|
|
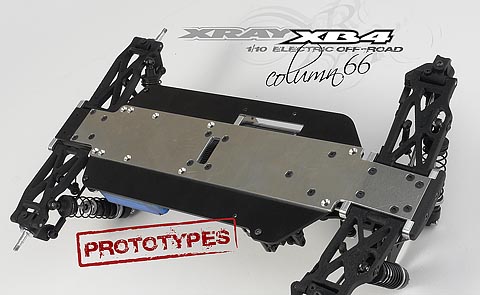
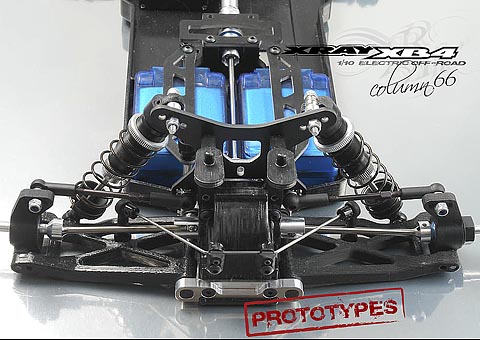
| Being lost for while, I just decided to keep from my mind away from typical constructions and forget what was the class standard. I needed to keep an open mind and focus on what I wanted to achieve. Since I wanted ideally to use two different chassis type for two different track conditions, a quick idea flashed into my mind â“ why not incorporate both chassis and with Multi-Flex settings let the driver adjust the chassis flex as required. So in short, build a chassis from two different chassis which would be used at the same time be able to be adjusted for different traction conditions. For high-traction tracks the Multi-Flex would be set as stiff as possible, while for low-traction conditions the Multi-Flex would be soft to allow the chassis to generate traction. For any conditions in between, Multi-Flex could be adjusted to medium stiffness. The composite chassis would also be great for absorbing energy on very bumpy tracks, which would help stabilize the car. And finally with this idea I could have all the electronics placed in a composite chassis that would be âśunsprungâť from the main aluminum chassis. |
|
(click to enlarge) |
|
|
|
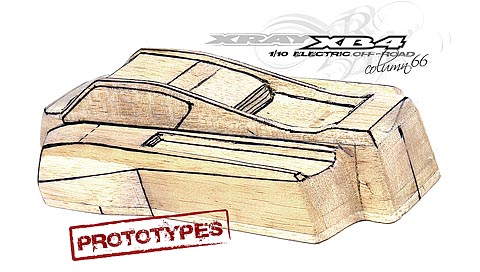
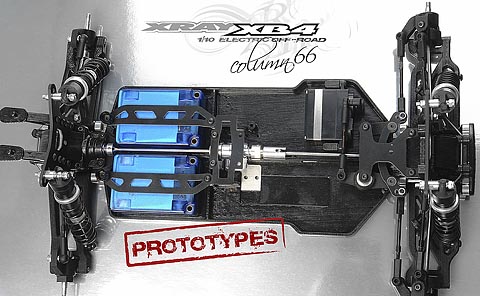
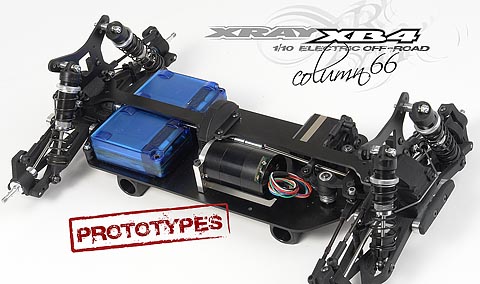
At first thought this sounded like a great and innovative idea, but the moment we hit the design board plenty of related design problems hit. The main problem was how to allocate all the internal parts of the car into the composite chassis, and how to position all the parts so the car had proper side-by-side but also front-to-rear weight balance.
Fighting with every millimeter of space in the chassis, we prepared several different chassis layouts from which I choose my favorites. From those we made rapid prototypes to see and feel the product in real life. |
|
(click to enlarge) |
|
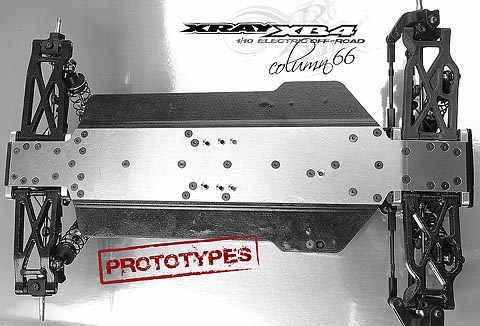
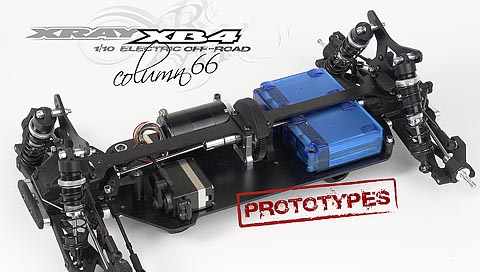
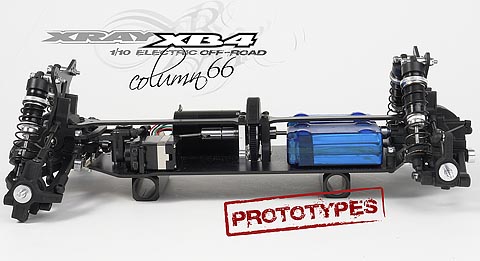
| Motor position: |
|
| Despite seeming to be an insignificant detail, the opposite is true. The position of the motor â“ whether it be in front, middle, or rear â“ influences the rotation of the car in the corners and provides different handling characteristics. After extensive consideration, I decided for a middle-motor position which gives the car neutral rotation in the corners. |
|
(click to enlarge) |
|
| Weight balance: |
|
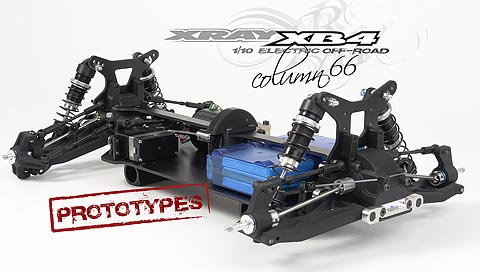
| This feature has very significant influence on a handling of the car, especially in off-road with a lot of jumping, and I did not want to make any mistake here. Of course the weight balance possibilities were directly related to the chassis design, so while designing the chassis I had to keep in mind the influence of weight balance too. As a first stage, I needed to decide whether to use a single battery pack or saddle packs. This was a dilemma I was fighting with for some time. Using the single pack allowed the battery to be placed in the chassis centerline for perfect side-by-side balance, but since I already decided on a shaft drivetrain it would mean that the rear drive shaft would have to be above the battery. Moving the rear drive shaft above the centralized battery would also mean that the center slipper clutch and rear diffs would have to be moved higher giving a higher CG. It is true that the upper shaft position gives the car more rotation but for me this rotation is not natural and is kind of forced, which in my experience decreases the stability of the car. |
|
(click to enlarge) |
|
|
|
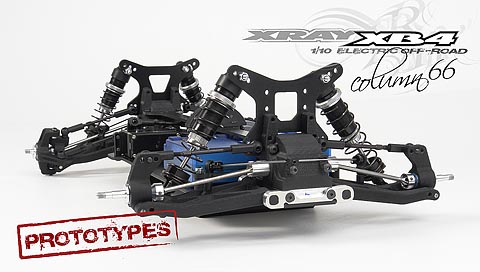
| After some consideration I decided on a saddle pack configuration as the current LiPo batteries are much lighter than previous types so the negative effect of more weight on the sides is balanced by the positive features which is that the central drive shaft could be positioned between the saddle packs and be ultra low (along with the center and rears). With a lower slipper clutch position, the rotary moment from motor is also as low as possible which is great for handling of the car. The lower motor position requires using smaller spur and pinion gears, but this was a tiny issue I could live with easily. |
|
(click to enlarge) |
|
| Suspension geometry: |
|
| I know this will sound repetitious, but believe me the suspension and its geometry are crucial for good handling and performance of a model car. I was not afraid to search for best composite mixture, as we already have so much experience on that. I narrowed the choice of mixtures to a very few to be used for final prototype testing. I was more concerned about the suspension geometry. At that time I was working on updating the XB9 suspension and so I decided to follow the same pattern and use the same concepts for the XB4 platform. So yes, you will notice that the suspension of the XB4 and XB9 are very similar. The suspension has very easy roll center adjustment which is crucial for quick set-up changes, easy change of roll centers on steering blocks and uprights, and of course similar steering linkages and associated Ackermann positions. Like on the XB9 I used the very useful rear upright lower roll center position, which allows super-fast changing of the roll center by simply moving the suspension pin to a different hole. In conditions when I need the car to be more stable and have more traction, I move the roll center pin to outer position; on the other hand when I need more rotation in the corners (like on carpet tracks with high traction) I simply move the pin inside. In only a few seconds you have completely different handling cars. |
|
(click to enlarge) |
|
| Differential: |
|
| With very good experiences with the gear diff in the T3, I decided to use the very same construction for the XB4. To be honest I did not even consider a ball diff at all. The only worries I had were for the main crown gear. To avoid problems we made the crown gears a bit larger with larger teeth module so the gear mesh could be adjusted easily and provide maximum free engagement of the teeth. With the higher dimension of the gear, we decided to go for a very special composite mixture which will have the lowest weight to compensate for the increased size. So in the end the gears will have a very low rotating mass. |
|
(click to enlarge) |
|
| Drivetrain: |
|
| To keep the lowest possible weight and guarantee the longest lifespan, there was no other option considered than to use HUDY Spring Steel™ for all drivetrain parts to keep the lowest weight while still keeping the strength. |
|
(click to enlarge) |
|
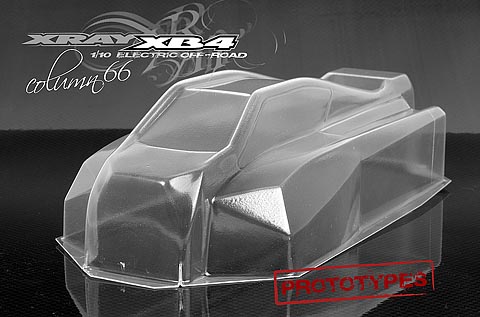
| Wheels: |
|
| This seems to be a very simple part, but this was another dilemma for me. There does not seem to be an industry standard when it comes to wheel mounting in this class, so I had to make the choice on my own. I really do not understand why still some cars use a shim with pin to mount the wheel. For me the hex wheel mounting like on 1/8 off-road or touring cars seems the most logical and I did not consider anything else at all. Especially when I knew that I would want to use different offsets for fine set-up at the different tracks, there was in the end no other choice than to use a hex wheel mounting. To make the wheel mounting strong, reliable and safe I choose the 14mm hex and adjusted the wheel accordingly. |
|

|
I will get back with some more details and testing in the next column.
See you around the tracks!
Enjoy the ride and 'til next time,
Dipl. Eng. Juraj Hudy
XRAY Chief Designer
|
| Archive: |
|
Column #1 - Behind the Scene Stories
Column #2 - Worlds Flashback
Column #3 - T2'007 Debut
Column #4 - Designing the T2'007
Column #5 - Worldcup Review and NT1 Testing
Column #6 - Developing and Designing the NT1
Column #7 - Developing and Designing the NT1 - Part 2
Column #8 - Back to the Races
Column #9 - XT8 Truggy Development
Column #10 - Touring Car Development
Column #11 - Bling-bling Mentality
Column #12 - Hot Summer Washout
Column #13 - New Electric Touring Car
Column #14 - Off-road Development
Column #15 - My micro love
Column #16 - Back in the Dirt
Column #17 - Worlds Preparations
Column #18 - 808 Tests & Stress
Column #19 - Excited for the Worlds?
Column #20 - Statistics, Expenses Sheets, Production Analysis, Calculationsâ¦
Column #21 + Column #22 - Euros + Euros + Worlds
Column #23 - The Busiest Season Ever
Column #24 - In Between the Worlds
Column #25 + Column #26 - Well Developed or Overdeveloped?
Column #27 - Back to The Future
Column #28 - 2009 Kick-off
Column #29 - Crazy what?
Column #30 - Last indoor race of the season
Column #31 - Getting into summer season
Column #32 - Heading for the Euros
Column #33 - Testing - Always last minute, always new ideas
Column #34 - European Champion - title celebration
Column #35 - Time to move on
Column #36 - National Heroes
Column #37 - 2010 ready
Column #38 - Decade of Triumph
Column #39 - 2010 Racing Calendar
Column #40 - DHI, ETS & NĂĽrnberg Show
Column #41 - World Championship Practice
Column #42 - EC indoor, EC 1/12, Silverstate, LRP Masters, Neo
Column #43 - Nationals All Around
Column #44 - Warm Warm-ups, Challenging Challenges
Column #45 - Electric Touring Worlds 2010
Column #46 - Team XRAY - World Champion!!!
Column #47 - Summer Vacation, 30x USA Champion Title
Column #48 - T3 Saga Continues
Column #49 - RX8 â“ What? How? When?
Column #50 - The Making of the RX8 â“ Part II
Column #51 - Shake It, Baby, Shake It...
Column #52 - Racing Season â�11 Full Running
Column #53 - From On-road to Off-road
Column #54 - Testing and Once Again⦠Testing
Column #55 - Half of the EC Championships â“ Done!
Column #56 - Summer is Goneâ¦Euros are Done
Column #57 - Never-ending Development
Column #58 - From XB8 to XB9
Column #60 - 2012 Season Running
Column #61 - Crazy Months
Column #62 - ETS Champion
Column #63 - 2012 Racing Summer Summary
Column #64 - Making the T4, Part 1
Column #65 - Making the T4, Part 2
|
|